Floating Buttons in Blog Posts without Coding
Just recently I had a friend tell me that she wanted some floating share buttons for her website. The company who has been creating her website and is managing it for her as well was however telling her it would involve a few hours of work which they would invoice her for.
For many websites I build, I am using the Elementor Page Builder, which makes it very easy to add floating buttons to your WordPress pages, blog posts, or archive pages.
I will be demonstrating how to add floating buttons in all of your blog posts at once with the Elementor Theme Builder.
The best part, you need no coding, HTML or CSS capabilities to get this done!
Why You Want To Use Social Share Buttons On Your Content Pages?
Whether you are blogging regularly or occasionally, write full-time or use content for as a marketing strategy for your business, you are most likely putting a lot of effort into writing excellent copy.
Either about helpful or inspiring topics. In online marketing terms, we call this sharable content. And that really is what great copy does; it makes people want to share it with their peers to also help them out. And yet, many websites don’t make it easy for their audience to share content.
On mobile, it takes a bunch of clicks to copy a URL, which sets up unnecessary roadblocks on the way to a successful share. And that is where social share buttons can make a huge difference. The easier it is to share great content, the more it is going to be shared.
Floating share buttons make it extremely easy as your readers don’t even need to scroll to the top or bottom of the content piece to share it.
Social Proof Matters
Some people like to have social share buttons also display a counter for how many shares a certain post has. If you are not a big news site that has tons of readers and tons of shares, I will urge you not to put a share count alongside your social share buttons. That said, it can act as social proof for viable content, but so do search rankings.
No Social Share Plugin Needed
In the world of WordPress websites, many plugins fight for more installs. And so, there is a plugin for everything. Something to consider, though, that every single plugin brings in extra code to be loaded, sometimes poorly optimized, or they might be a potential security risk as they have to get regular patches to close unwanted security holes.
All that should make you think twice if you want to use plugins for such simple tasks as to add social media share buttons to your pages.
Adding Social Share Buttons To A Page Template for Blog Posts Or Custom Post Types
Elementor Pro has something called the theme builder. It is used, for example, to create one custom layout for all of your blog posts. Historically, such stylings are implemented via a WordPress theme, hence the name Theme Builder.
To add the floating buttons, we will enhance an already existing page template for the blog posts and ad the floating buttons into the central layout.
Add The Elementor Social Buttons To Your Page or Page Template
Elementor, even the free version, comes with a native element called “Social Buttons”. We will be using this element to create our floating bar.
To add an element to a template, just click-drag the Social Buttons element to the WYSIWYG Editor. It can be added pretty much anywhere as we will position it later on.
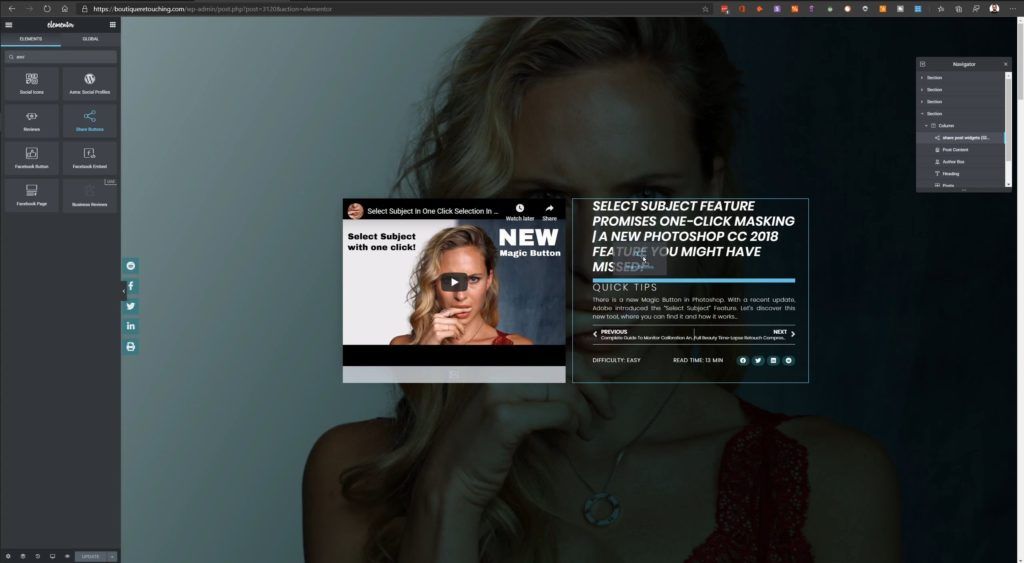
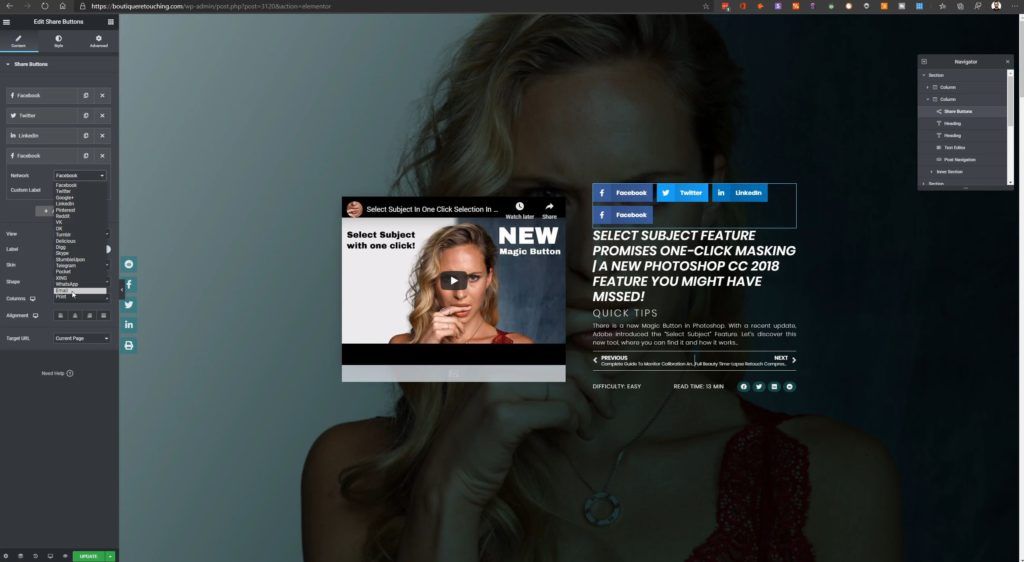
Add Your preferred Social Networks
In the second step, you can add all the destinations you want people to share your content to. Here it is important to not overcrowd your social share bar, but at the same time, choose the right platforms your readers might be on.
Make it a Floating Share Bar
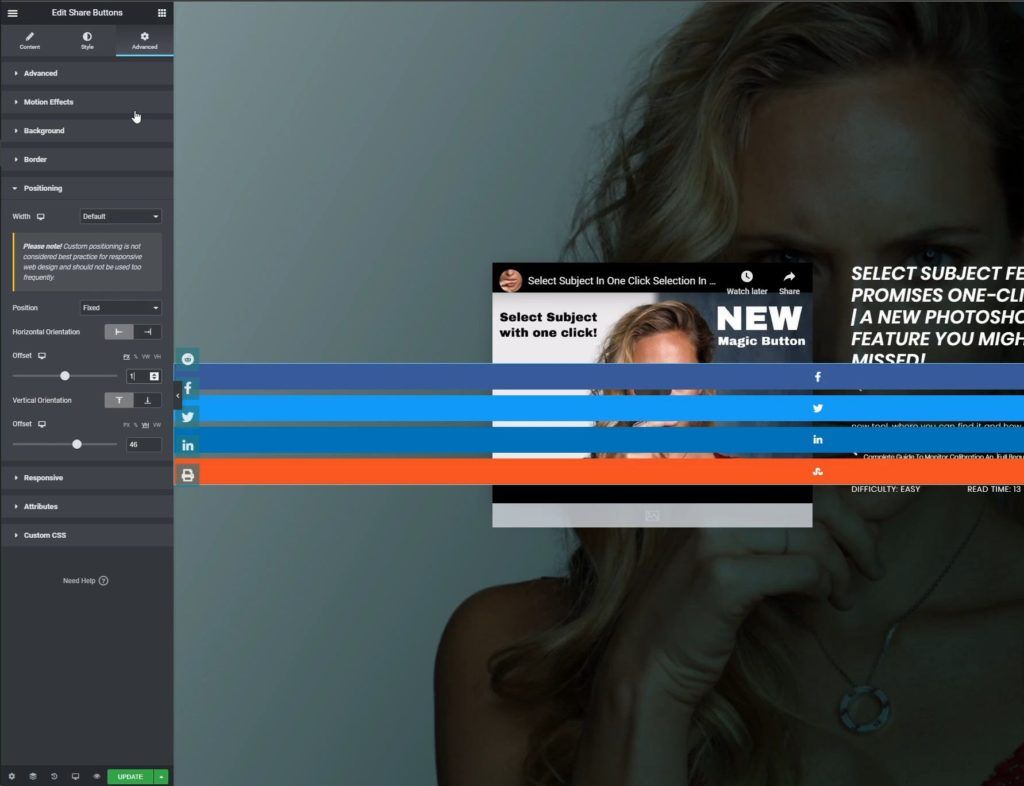
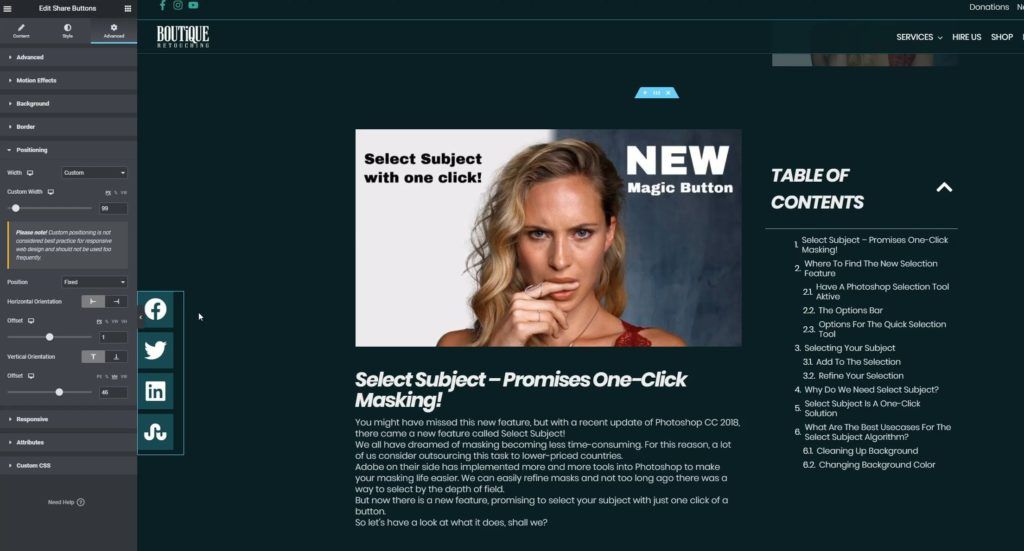
For an element to “float”, we have to position it outside of the content. The CSS value that does this is called “Position: Fixed”.
We then can position it to be a few pixels from the left side (to your liking) and position it vertically at around 50% VH (view height). This will put the element at this screen position, no matter where they will be scrolling. And that’s what makes the social share bar float over the page.
Styling The Social Share Buttons
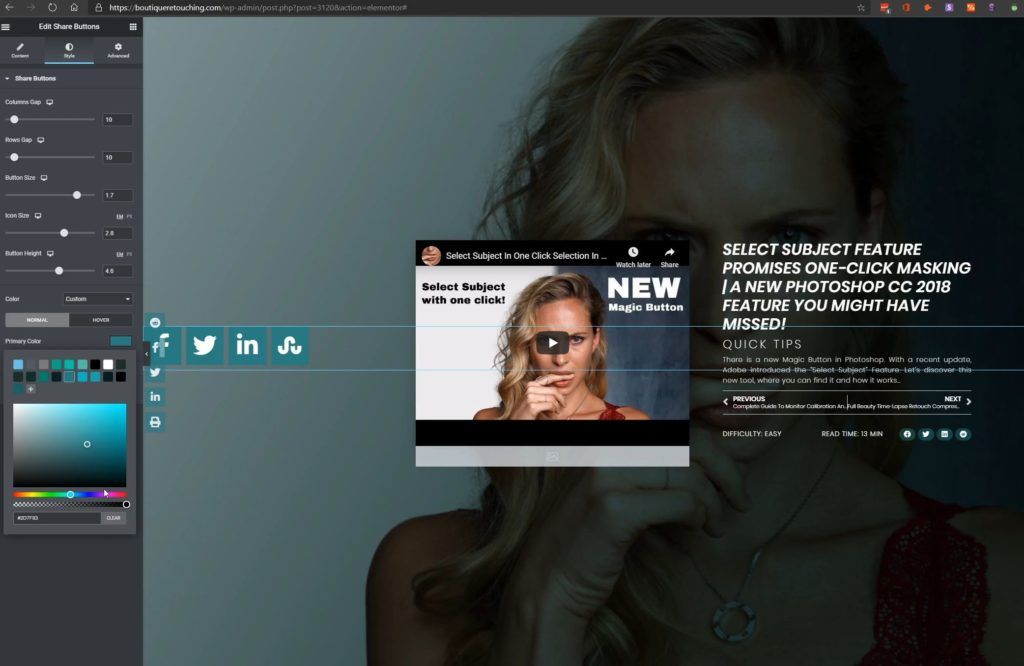
Out of the box, the social share buttons come with the dedicated colors of each destination. Elementor also puts the icons of all the destinations they let you choose from, which is super handy.
To make the element more align with your brand and your website, we can customize the buttons to fit in properly.
In the styling tab on the left side, you can change all sorts of values, colors, button- or icon size to your liking.
Dedicated social icons of the most common social media sites are natively supported with the Elementor widget we are using.
Change The Width Of The Social Share Bar
As you can see, the element now stretches all over the page. That’s not what we want.
Generally, the buttons align next to each other. By giving it a fixed width value, we can decide when the elements break their lines to arrange underneath each other. So, if we make the element width in the positioning settings just slightly larger than what the elements are, they will always arrange as a vertically aligned bar.
Publish changes
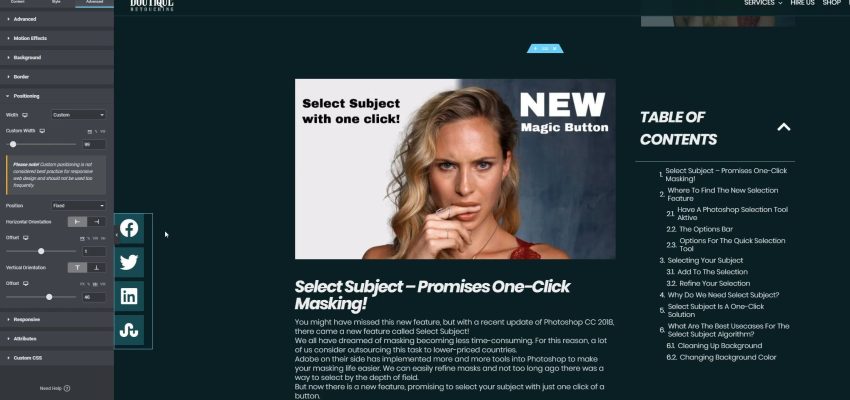
Finally, once you are satisfied with your social share buttons, you can update your existing Elementor template, or, if you are creating a new one, you can first set display conditions to determine when and where this template gets hooked into or is going to be applied. In most cases, this is going to be all singles or all posts.
After saving, you can jump onto the frontend of your website and check out how the styling applies to the actual website.





One Response
Nice